How to Install a New Toilet: A Beginner’s Plumbing Guide
Installing a new toilet may seem like a complicated task, but with the right tools and step-by-step guidance, it’s a project most DIYers can handle. Whether you’re upgrading your toilet, replacing an old one, or installing a toilet in a new bathroom, this comprehensive guide will walk you through the process. From removing the old toilet to setting up the new one, here’s everything you need to know for a successful toilet installation.
1. Gather the Necessary Tools and Materials
Before diving into your toilet installation project, make sure you have all the required tools and materials on hand. Being prepared will make the job faster and easier.
Tools and Materials You’ll Need
New toilet (including bowl and tank)
Wax ring
Toilet bolts (often come with the toilet kit)
Adjustable wrench
Socket wrench set
Plunger (in case of clogs)
Screwdriver
Level
Tape measure
Bucket and sponge (for cleaning)
Plumber’s putty (optional)
Caulk (for sealing around the toilet base)
2. Remove the Old Toilet
If you’re replacing an old toilet, the first step is to remove it from its current position. This is a relatively simple process, but be sure to take proper precautions to avoid mess or damage.
Step-by-Step Guide to Removing the Old Toilet
Turn Off the Water Supply: Start by turning off the water supply to the toilet using the shut-off valve, typically located behind or near the toilet.
Flush the Toilet: Flush the toilet to drain the tank and bowl of excess water. Use a sponge or towel to soak up any remaining water inside the tank or bowl.
Disconnect the Water Supply Line: Use an adjustable wrench to disconnect the water supply line from the toilet’s fill valve. Be cautious as some residual water may spill.
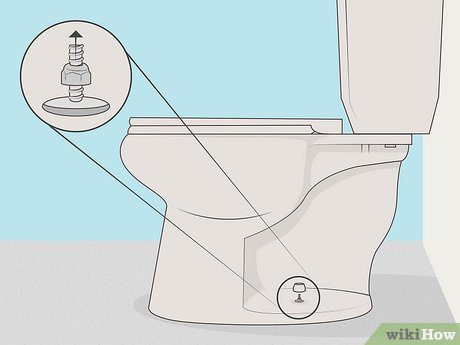
Remove the Toilet Bolts: Locate the two bolts securing the toilet to the floor. Use a socket wrench to remove these bolts. Keep these bolts, as you may need them for the new toilet.
Lift the Toilet: Once the bolts are removed, gently rock the toilet back and forth to break the seal and lift it off the floor. Place the toilet aside in a safe area.
3. Prepare the Toilet Flange

The toilet flange is a crucial part of your toilet installation, as it connects the toilet to the drain pipe. If the flange is damaged or corroded, it should be replaced before installing a new toilet.
Step-by-Step Guide to Preparing the Toilet Flange
Inspect the Flange: Examine the toilet flange to ensure it is in good condition. If the flange is cracked, bent, or otherwise damaged, replace it with a new one.
Clean the Flange Area: Remove any old wax ring residue, dirt, or debris from around the flange using a sponge or rag. Make sure the area is dry and clean before proceeding.
Ensure the Flange is Level: Use a level to check that the flange is sitting flush with the floor. If it’s not, use flange spacers to bring it up to the right height.
4. Install the Wax Ring
A new wax ring is essential for creating a watertight seal between the toilet and the flange. This step ensures that there are no leaks around the base of your toilet once it’s installed.
Step-by-Step Guide to Installing the Wax Ring
Position the Wax Ring: Take the new wax ring and place it directly over the toilet flange. Ensure that the ring is centered and evenly placed around the flange.
Check the Wax Ring: If your toilet comes with a wax ring that has a plastic horn (extension), make sure the horn faces into the flange to create a better seal.
5. Install the New Toilet Bowl
Now that your flange and wax ring are ready, it’s time to install the new toilet bowl. This step requires care and precision to avoid misalignment or potential damage to the toilet.
Step-by-Step Guide to Installing the Toilet Bowl
Align the Toilet Bowl with the Flange: Carefully lift the toilet bowl and align it with the flange, ensuring that the holes in the toilet bowl line up with the flange bolts.
Press Down to Create a Seal: Once the toilet bowl is aligned, gently press down on the toilet to compress the wax ring and create a tight seal between the toilet and the flange.
Tighten the Bolts: Secure the toilet bowl to the flange by tightening the toilet bolts. Be careful not to overtighten, as this can crack the toilet bowl.
6. Install the Toilet Tank
Next, you’ll install the toilet tank. Most toilets have a separate tank and bowl, and the tank must be attached securely to the bowl to ensure proper flushing functionality.
Step-by-Step Guide to Installing the Toilet Tank
Position the Tank: Align the toilet tank with the bowl and match up the bolt holes.
Attach the Tank to the Bowl: Insert the bolts through the tank and into the bowl. Tighten the nuts onto the bolts with a wrench. Again, avoid overtightening, which could crack the tank.
Connect the Fill Valve: Use an adjustable wrench to connect the water supply line to the toilet’s fill valve. Ensure the connection is secure to prevent leaks.
7. Level the Toilet and Adjust the Fit
After securing the toilet in place, check that the toilet is level and properly aligned. A crooked or wobbly toilet can cause issues with flushing and leaks over time.
Step-by-Step Guide to Leveling the Toilet
Check the Toilet’s Level: Use a level to check that the toilet bowl is sitting evenly on the floor. If the toilet is not level, use shims to adjust the height.
Adjust the Bolts: Tighten or loosen the toilet bolts slightly to ensure that the toilet is standing straight and balanced.
Caulk Around the Base: Once the toilet is level, apply a thin bead of caulk around the base of the toilet to seal it against the floor and prevent water from leaking underneath.
8. Turn On the Water Supply and Test the Toilet
Now that the toilet is installed, it’s time to reconnect the water supply and test the toilet’s functionality.
Step-by-Step Guide to Testing Your New Toilet
Turn On the Water Supply: Open the shut-off valve and allow the tank to fill with water. Check for any leaks around the base, tank bolts, or water supply connection.
Test the Flush: Flush the toilet a few times to ensure that the tank fills and empties correctly. Check for any leaks around the base or other areas, and tighten any bolts if necessary.
Conclusion
Installing a new toilet might seem like a daunting task, but with the right preparation and careful attention to detail, it’s a manageable DIY project. By following the steps outlined in this guide, you’ll have your new toilet installed and ready to use in no time. If you run into any problems or notice persistent leaks, don’t hesitate to call a plumber for professional assistance.
Regular maintenance and occasional inspections will help ensure that your toilet continues to function efficiently for years to come.